


HOSTS- Jeremy Burns, Matthew Scott Phillips
TYPE- Ear Training
DURATION- 92:47
BUMPER MUSIC- "Sequence 78" (Area 47 Music)
ANNOUNCER- Mike Cunliffe
Melodic dictation, the act of transcribing and notating a melody by ear, is an important skill for a musician to cultivate. In this episode, we will share some tips and get right in to some examples. Ready your ears and get ready to explore the major scale!
MELODY- A succession or arrangement of notes forming a distinctive sequence or theme, often repeated or revisited through out the piece. This is the horizontal aspect of music.
SCALE- A pattern of notes, arranged in whole steps and half steps, that span an octave.
TONIC- The root or foundation of a key or scale. This is scale degree 1. The ultimate directional goal of harmony.
MELODIC DICTATION TIPS
Basic Tips To Consider Before You Begin To Analyze A Given Melody
1. IDENTIFY THE TONIC
Listen to all the textures and see if you can identify "home base". This will help later when you engage your theory brain to figure out what this melody is made of. In an aural skills class, your instructor will establish this before they play the melody in question.
2. HOLD ONTO "DO", (SCALE STEP ONE)
If you know where home base is, you should be able to find "DO", or scale step 1. Try to hold on to that tone in your inner ear as you listen to the melody in question.
3. ESTABLISH THE RHYTHM
Sync your internal clock with the tempo and time signature of the melody in question. Count in your head as you listen to the melody in question.
"8 Ear Training Tips To Pass Ear Training Exams" by Julian Bradley
1. INTERNALIZE THE MUSIC
The first one or two playings are about listening and memorizing the music. If you can play the music in your mind, you won’t have to depend on having to hear the melody you’re trying to learn.
2. DO THE WORK DURING REST PERIODS
Try not to be notating while the melody is playing. During those first 2 listens, formulate a theory about what’s going on in the melody.
3. INTERVALS FIRST
Start with a section of the melody. Don't worry about every note, just a few in a row. It is suggested that we don’t try to associate melodies with those you already know (P4=bridal march, M6=My Bonnie, etc). Rather, sing the two notes a few times, back and forth and then break up the interval by trying to sing a note in between. If you can find two intervals between two notes, try to add these two together. This is known as the “Stepping Stone” method.
4. WHERE DO THE INTERVALS FIT IN?
Once you have a few intervals figured out, you can begin to relate them to the scale degrees or note names. You can use a bit of deduction. For example, if you hear the interval of a 1/2 step, in a minor key, you know that there are only 2 places that occurs (between scale degrees 2 and 3 and between scale degrees 5 and 6). The same goes for major, where the 1/2 step is between 3 and 4 and 7 and 1. The more intervals in a row you can ID, the closer you’ll be to finding the melody.
5. HUMMING
Hum the melody to your self- We talked about the class room environment. Julian suggests a workaround, Plug one ear with your finger and hum quietly.
6. THINK LOGICALLY
Keeping in mind what we discussed in step 4, you can also make logical guesses on what’s going on (based on what you know about the genre you’re analyzing). For example, if you know the key and the starting chord, you can make an educated guess about the starting note. The ROOT, 5th or 3rd are all good places to start. This same concept also applies to the ending note.
7. TRACK THE MELODY
Knowing where the melody is, in the given key, makes transcribing easier. Even just knowing the 3 or 4 notes (from step 3) will inform you on the new notes as you move up or down the scale. A lot of melodies move by step so you will likely not need to be terribly concerned about leaps of a P5 or larger. That's not to say leaps larger than P5 never happen!
8. SWITCH THE KEY
If you can switch the key (in your mind) to a key that your more familiar with, it may help you identify the notes better as you hear them. Of course, it will be necessary to transpose back to the original key when notating.
THE FOLLOWING EXAMPLE WILL CORRESPOND WITH THE FIRST EXAMPLE IN THIS EPISODE (KEY OF A MAJOR)
PREPARATION
WE'VE BEEN GIVEN 2 THINGS
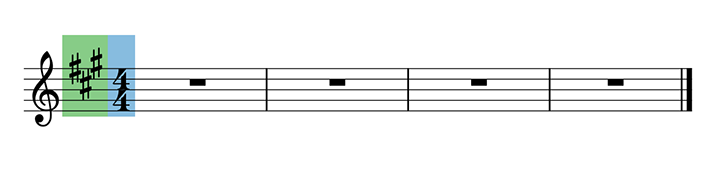
1. KEY- A major
2. TIME SIGNATURE- 4/4
So let's notate that, as shown below.
FIRST LISTEN
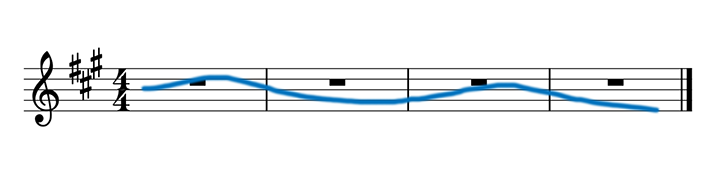
On the first listen, we will focus on our general impressions. We will keep the rhythms in mind, but we will mainly be noticing the general contour of the melody and trying to get it in our head. Let's listen!
GENERAL IMPRESSIONS
The overall GENERAL IMPRESSION of this melody, without worrying about the actual notes, feels like it moved slightly up, then back down (beyond the starting note). From there, it moves back up, and then further down
SECOND LISTEN
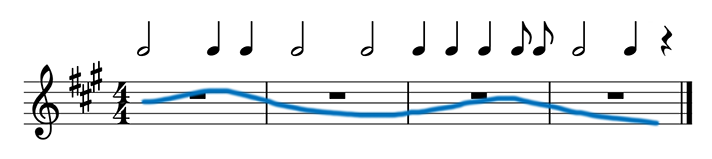
On the second listen, we want to focus on the notes themselves. Let's try to figure out their rhythms and notate these note values above the staff. It's also important to pay attention to the spaces between the notes. Notice that quarter note rest in the last measure.
THIRD LISTEN
Before we attempt to notate this melody, we must first find the starting note. Using our "sing down" method, we found that we could only go down three steps before landing on the tonic. That means our starting note is on the 3rd scale degree (C#, in A major). Notate it!

NOTATE YOUR MELODY
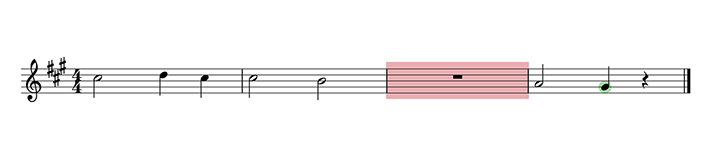
We know we started on scale step 3 (C#). Let's notate a melody that fits the contour of our GENERAL IMPRESSION. The motion sounds stepwise up and back down. So let's have our notes move accordingly. We also heard a leading tone at the unresolved HALF CADENCE, in measure 4. We got pretty far but we're not entirely sure about that THIRD MEASURE. So it's okay to leave it blank and move on. In my case, I had no other option! Hear what that will look like:
FOURTH LISTEN
Let's engage our THEORY BRAIN to confirm any unanswered questions. In this case, it took some trial and error before we arrived at the below results.

FIFTH LISTEN
This is the time to confirm all of your prior decisions. Keep engaging your theory brain as you double check the rhythms, the contour and the cadence. When we overlay the contour from our original impressions on top of the final melody, it appears we came pretty close!

CONTINUE USING THESE STEPS AS WE TAKE ON THE REMAINING MELODIES
-You don't need to have perfect pitch to learn good aural skills. Rather, you need to sharpen your skills of RELATIVE PITCH.
-We've talked about identifying what note you are on by singing down, or up to the tonic. This works for all notes but it comes a little easier when singing from the 3rd and the 5th.
-Consider addressing the first and last measures first. Then use the following listens to fill in the middle sections.
-Get a kick start on identifying melodies by singing (or humming or whistling) the MAJOR scale and some patterns based on it.